Select Vessel  Open.
Open.
The first step in creating a crane work shift is to open the required vessel and views. Then continue with creating work shifts, either automatically (on page 1) or manually (on page 1).
To set your vessel and views:
Select Vessel Open.
In the Select a Vessel/Voyage dialog box, select the required vessel and click Open.
XPS opens the vessel profile view for the selected vessel.
Select Vessel Quay Commander.
In the Quay Commander window, from the Time Range list, select Vessel Visit.
Select Planning Maintain Work Shifts.
The Work Shifts window displays the crane schedule for the open vessel. In this case, it is still empty because you have not defined any shifts.
If the Work Shifts window was open before the vessel, from the Display list, select Show Shifts for Specific Vessel, and then select the open vessel.
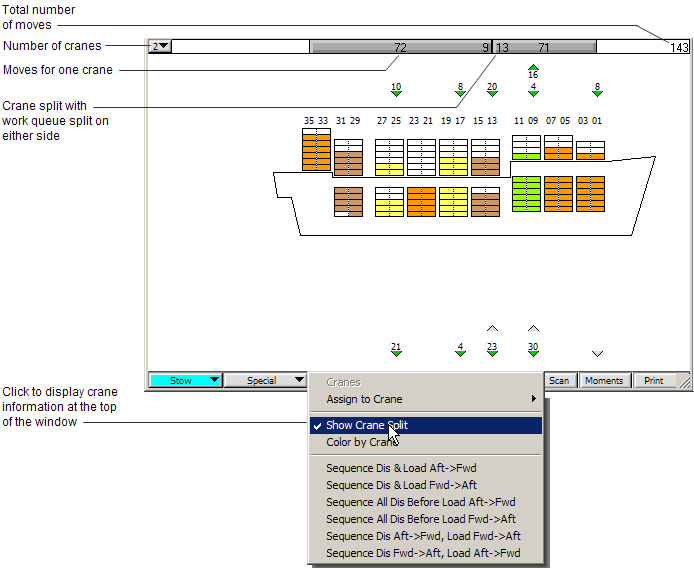
In the vessel profile view, from the Cranes list, select Show Crane Split to see how moves would be distributed among the cranes working the vessel.
This command provides information only. It does not assign work queues to cranes, and it does not split work queues. It simply calculates and displays a straight arithmetic split of the load and discharge work instructions based on the selected number of cranes. The default number of cranes is two, but you can select a different number from the drop-down list.
If the number of work instructions (total moves) is not equally distributed across work queues, XPS displays the number of moves to be split in the center work queue on either side of the crane split bar.